Once we're in XFCE, its time to get to business. The first thing that we need to do is install the Arduino IDE, which will allow us to write "sketches" and load them to the Arduino processor.
There are already some helpful tutorials on how to do this in Ubuntu, the most helpful of which was this one:
However, I didn't have any problem just getting and running the IDE package from the Ubuntu repository, so I will provide instructions to do it that way instead of downloading the most recent versions of the software.
We will use the Advanced Package Tool apt to locate the Arduino IDE on the Ubuntu software repository server and install the package arduino on our machines.
First though, we need to do that for a couple other critical components to our system. These include gcc-avr and avr-libc, two packages that compile code written in the C programming language to Atmel AVR microcontrollers, which are used as the CPUs on Arduino boards.
We also need to install the open source Java Development Kit (OpenJDK) because the Arduino IDE is written in the Java programming language. There is currently a version 7 of OpenJDK, but it seems like version 6, openjdk-6-jre, is sufficient for Arduino IDE.
This can all be done simultaneously with a single command line argument:
sudo apt-get install gcc-avr avr-libc openfdk-6-jre arduino
Once these are installed, we can in principle, plug in our board and get to work. However, we do need to know the port address that Ubuntu is using to communicate with the Arduino board via USB. This seems to be a standard ttyACM0, but to find out for sure, we can execute a dmesg to read the kernel ring buffer, which is written to memory at boot and contains information about hardware loaded to the machine. To grab the information about serial input/output devices specifically (i.e. USB connections), we use the command line argument:
dmesg | grep -i tty
Note: grep is an awesome command that can pull text and works alot like find.
There may be some other kinks to work out, which are discussed in the troubleshooting section of the post that is referenced and linked above.
Friday, September 6, 2013
Saturday, August 10, 2013
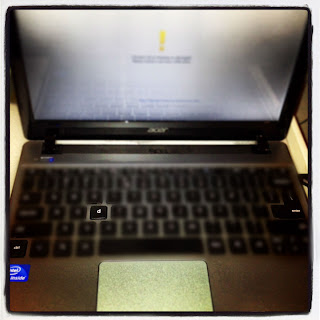
Step By Step Guide to Installing Ubuntu on an Acer C7 Chromebook
OK, so now I'm ready to create a tutorial that can guide students through a step-by-step installation of Ubuntu on a Chromebook.

.jpeg)

.jpeg)


Step 1: Developer Mode
Developers are Hackers and Google has created a special place for them:
- Hold down esc+refresh+power.

- When you see the yellow exclamation mark, hold down ctrl+d then press enter.

- When you see the "To turn OS verification OFF, press ENTER" prompt, press enter;
.jpeg)
- Take a 4 minute break while Developer Mode is activated!

- When you see the "OS Verification is off" prompt and red exclamation mark press ctrl+d;
.jpeg)
Congratulations, you are now in developer mode!
Step 2: Download Crouton
ChRomium Os Universal chrooT envirONment
Click Me to download crouton;
Step 3: Install Crouton
Now things get trickier...
- Press Ctrl+Alt+t to open a crosh terminal window in Chrome;


- Type shell at the chrosh> prompt and hit enter to call the shell prompt

- Type sudo sh -e ~/Downloads/crouton -t xfce at the chronos@localhost / $ command line and press enter;

- Now, take a 30-minute break while crouton does its thing...
Friday, August 9, 2013
Creating a Screen Capture Tutorial on a Chromebook
So I've gotta hand it to my colleague Nathalie at the Adler, cause just yesterday she solved this problem for me without even knowing it. We were talking about creating video tutorials and she suggested creating a G+ Hangout without any guests, recording it to YouTube, and then using the screen capture functionality to create the tutorial. Brilliant. Unfortunately, this guy already beat me and Nathalie to it though.
Capturing a static screen is easy enough, just do a Ctrl+ , adding a Shift allows you to select the region of the screen.
My goal is to create a video tutorial for my students to help them hack the Chromebook to run Linux Ubuntu. There are some great tutorials out there in the blogosphere already, but kids hate reading. So I'll try to pull this off in Chrome OS using G+ Hangouts. Once I'm in Ubuntu, I'll have to switch to another tool.
The regular G+ Hangout environment doesn't support lonely hangouts or streaming to YouTube. To do that, you need to go live using Hangouts On Air. The upside is the video capture, the downside is that people get to sneak into your hangout if they're trolling the hangouts website.
So lets give this a shot... first, I'm going to skip a few steps but to try and create a tutorial that will launch the already installed Linux Ubuntu OS using the Chrome OS crosh terminal. This requires three steps:
1. Press Ctrl+Alt+t to open a crosh terminal window in Chrome;
2. Type shell at the chrosh> prompt and hit enter to call the shell prompt
3. Enter sudo enter-chroot startxfce4 at the chronos@localhost / $ command line and press enter (CHECK: no spaces between enter, hyphen and chroot);

This will launch the xfce desktop environment on the Ubuntu Linux OS already installed.
Now... in video tutorial format:
Not bad for my first attempt. Clearly though, I will need a little scripting to get this right.
Capturing a static screen is easy enough, just do a Ctrl+
My goal is to create a video tutorial for my students to help them hack the Chromebook to run Linux Ubuntu. There are some great tutorials out there in the blogosphere already, but kids hate reading. So I'll try to pull this off in Chrome OS using G+ Hangouts. Once I'm in Ubuntu, I'll have to switch to another tool.
The regular G+ Hangout environment doesn't support lonely hangouts or streaming to YouTube. To do that, you need to go live using Hangouts On Air. The upside is the video capture, the downside is that people get to sneak into your hangout if they're trolling the hangouts website.
So lets give this a shot... first, I'm going to skip a few steps but to try and create a tutorial that will launch the already installed Linux Ubuntu OS using the Chrome OS crosh terminal. This requires three steps:
1. Press Ctrl+Alt+t to open a crosh terminal window in Chrome;
2. Type shell at the chrosh> prompt and hit enter to call the shell prompt
3. Enter sudo enter-chroot startxfce4 at the chronos@localhost / $ command line and press enter (CHECK: no spaces between enter, hyphen and chroot);

This will launch the xfce desktop environment on the Ubuntu Linux OS already installed.
Now... in video tutorial format:
Not bad for my first attempt. Clearly though, I will need a little scripting to get this right.
Thursday, August 8, 2013
Linux on a Samsung Chromebook
In order to develop a cheap (<$300) Arduino programming platform I chose a Samsung Chromebook ($250) as my personal machine to experiment with. My first task was to override the native operating system (Chromium) to install and run an application-based, desktop style, open source operating system. Luckily for me, the Chromium system was developed on a Linux kernel, meaning Google was just asking for developers to dive in and mess around.
HowToGeek's Chris Hoffman makes a very good point about Chromebooks and the Chrome OS.
HowToGeek's Chris Hoffman makes a very good point about Chromebooks and the Chrome OS.
Chromebooks aren’t “just a browser” — they’re Linux laptops. You can easily install a full Linux desktop alongside Chrome OS and instantly switch between the two with a hotkey — no rebooting necessary.Interesting... in fact, Chris notes that Google employee Dave Shneider developed a software package he called Crouton that can be installed on the Chromebook and exploits the Chrome OS "chroot" environment. Crouton allows you to run Ubuntu Linux alongside your Chrome OS, as quoted above. To install Crouton and Ubuntu, I followed the following two tutorials exactly, without any issues whatsoever:
- Lifehacker - a little more user friendly
- HowToGeek - a little more thorough
However, there is a lot in there that we can skip... so in my next posts, I'm going to break it down easy enough for a middle school student to follow, which is exactly what I hope to do in September.
But before I can make it that simple, I'm going to need to create some step-by-step tutorial videos. So, can you do screen capture in a Chromebook? Yes... but not video. However, I've already hacked my Samsung, so I'm going to try it in Ubuntu.
Wednesday, August 7, 2013
A $300 Arduino Programming Platform
In Fall 2013 I will begin teaching a Saturday STEM academy for 8th grade catholic school students in Chicago, as part of a Big Shoulders Foundation program. I'm calling it Hack Shop and I want to keep it cheap. The 20-week course will cover hacking the Chromebook (why not, that's fun), using a Linux shell command line interface, Arduino programming basics, and open source collaboration... maybe on GitHub.

Our budget is limited. We will have something on the order of $100-$150 per student; working in pairs bumps this up to $200-$300 per pair. Unfortunately, programming requires a human-computer interface; keyboards, screens, mice, etc. Surfing the web to file-share and collaborate requires an internet connection and a browser. Its hard to manage that, plus a programmable processor and peripherals for that price.
I considered trying to find used computers. FreeGeek Chicago was a great option for that. They are a local community development organization that works to up-cycle used computer equipment. They are awesome... but if I'm going to work with over 20 students that means over 10 machines. Each machine will have a different hardware build and that will be difficult to administrate, even if they are all running Linux.

I needed consistency. I also needed something easy to manage and transport. Hauling around bulky laptops wasn't going to work out very well for my back (though I could probably use the exercise).
So, to recap: cheap, reliable, easy to admin, small and light.
Enter the Google Chromebook. Right now, you can pick up a $200 Acer Chromebook, with 2GB RAM and a 16GB solid state drive at Best Buy. For another $50-$75 you can upgrade to 4GB RAM, 320GB drive. There's also a great $250 Samsung model which is particularly sleek for the price. They all feature HDMI display connections and some combination of USB 2.0 and 3.0, SD and micro-SD card slots, VGA connection, etc.


I've had some experience with these machines in the past as an educator at the Adler Planetarium. At the museum, we have been using Chromebooks with teens. Not only are they easy to use and popular among the students there, but there's another added benefit.
Chromebooks don't work like traditional PCs, they don't run a typical operating system with software applications, etc. Instead, they run a Chrome browser and web-apps. When students log into the machines, there is little they can do to change the computer. There's no concern about downloading illegal files because there aren't any software applications to run them. Moreover, any changes they make to the look/feel of the account is isolated to their own logins: Google syncs their settings and preferences so that it carries between machines and isn't tied to any specific machine. Having found all manner of junk and crazy wallpapers on student computers in the past, this is refreshing.
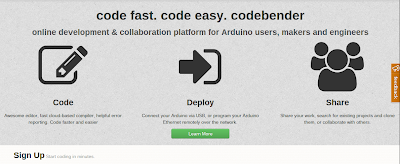
Of course, this is also the fundamental problem with Chromebooks... since they don't run software besides the browser, they can't run the Arduino IDE required to program the processor! There is however, an AWESOME web-based Arduino development and collaboration platform called Codebender. Unfortunately, they haven't developed a plugin for Chrome on the Chromebooks yet, so at the moment, that's not a solution.
Fortunately, the good people at Google built the Chromebook browser environment (Chromium) on a Linux kernel. So a whole bunch of people have exploited this to override the operating system. For more details, see my next post.

Our budget is limited. We will have something on the order of $100-$150 per student; working in pairs bumps this up to $200-$300 per pair. Unfortunately, programming requires a human-computer interface; keyboards, screens, mice, etc. Surfing the web to file-share and collaborate requires an internet connection and a browser. Its hard to manage that, plus a programmable processor and peripherals for that price.
I considered trying to find used computers. FreeGeek Chicago was a great option for that. They are a local community development organization that works to up-cycle used computer equipment. They are awesome... but if I'm going to work with over 20 students that means over 10 machines. Each machine will have a different hardware build and that will be difficult to administrate, even if they are all running Linux.

I needed consistency. I also needed something easy to manage and transport. Hauling around bulky laptops wasn't going to work out very well for my back (though I could probably use the exercise).
Enter the Google Chromebook. Right now, you can pick up a $200 Acer Chromebook, with 2GB RAM and a 16GB solid state drive at Best Buy. For another $50-$75 you can upgrade to 4GB RAM, 320GB drive. There's also a great $250 Samsung model which is particularly sleek for the price. They all feature HDMI display connections and some combination of USB 2.0 and 3.0, SD and micro-SD card slots, VGA connection, etc.


I've had some experience with these machines in the past as an educator at the Adler Planetarium. At the museum, we have been using Chromebooks with teens. Not only are they easy to use and popular among the students there, but there's another added benefit.
Chromebooks don't work like traditional PCs, they don't run a typical operating system with software applications, etc. Instead, they run a Chrome browser and web-apps. When students log into the machines, there is little they can do to change the computer. There's no concern about downloading illegal files because there aren't any software applications to run them. Moreover, any changes they make to the look/feel of the account is isolated to their own logins: Google syncs their settings and preferences so that it carries between machines and isn't tied to any specific machine. Having found all manner of junk and crazy wallpapers on student computers in the past, this is refreshing.
Of course, this is also the fundamental problem with Chromebooks... since they don't run software besides the browser, they can't run the Arduino IDE required to program the processor! There is however, an AWESOME web-based Arduino development and collaboration platform called Codebender. Unfortunately, they haven't developed a plugin for Chrome on the Chromebooks yet, so at the moment, that's not a solution.
Fortunately, the good people at Google built the Chromebook browser environment (Chromium) on a Linux kernel. So a whole bunch of people have exploited this to override the operating system. For more details, see my next post.
Subscribe to:
Posts (Atom)